There is nothing more frustrating than having your programs crash or slow down, resetting a Windows Virtual Memory is a simple fix
Are you also experiencing slowdowns and lags in Windows 10 or 11 and looking for a way to reset your virtual memory, also known as a paging file?
Memory management is handled efficiently by the Windows operating system, however, if you find out that virtual memory is not functioning properly, you may need to reset it manually.
Resetting a virtual memory is a simple process that can be done in a few steps easily in both Windows 10 and Windows 11.
How to Reset Virtual Memory in Windows 10?
There are several ways to reset a paging file (virtual memory) but, we’ll discuss only two methods which are short and easy too.
Let’s have a look at these methods:
- Using Windows Settings
- Using command prompt
Now, we’ll explore these two methods step-by-step individually.
Method 1: Reset Virtual Memory Using Settings
Windows operating system handles virtual memory itself to improve the system’s overall performance, however, it provides you a facility to manually change virtual memory size (or paging file size) as well, thanks to Microsoft. For those interested in a deeper dive into Windows activation and related topics, you might find resources on kms full activation methods informative. These resources often discuss key management services and their role in volume licensing for Windows and other Microsoft products. Understanding how KMS works can be beneficial for system administrators and users who manage multiple Windows installations.
You have to follow the given steps in order to reset virtual memory in Windows 10:
Step 1: Navigate to System Properties
Go to your Windows desktop.
Then, right-click on This PC and select Properties:

Alternatively, you can type “System” in the Windows search bar and select “System” from the list of results.
Moreover, you can also use the Control Panel to open system properties. To do this, open the Control Panel > System and Security > System.
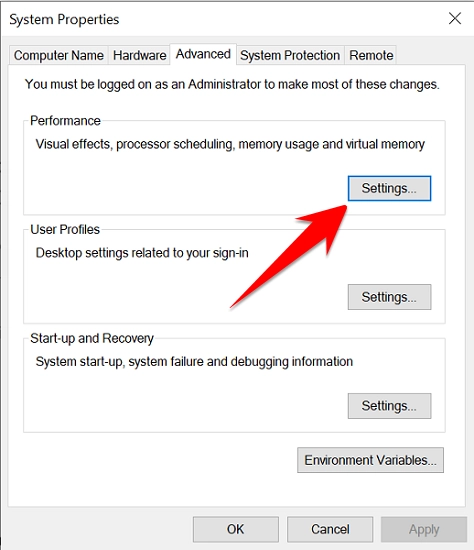
Step 2: Open Advanced System Setting
Now, click on the Advanced system settings located at the right sidebar or at the bottom of the page:

Alternatively, you can type “advanced system settings” in the Windows search bar and select “View advanced system settings” from the list of results.
In the advanced tab, click on Settings under the Performance section:
Step 3: Reset the Virtual Memory Settings
Now, coming to our next and main step which is to reset the virtual memory size.
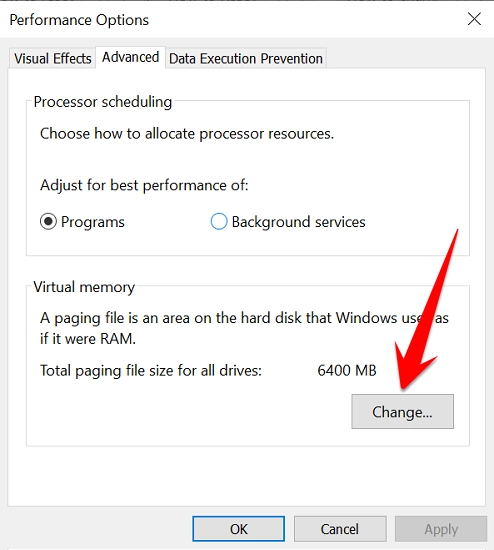
In the Performance Options window, go to the Advanced tab:
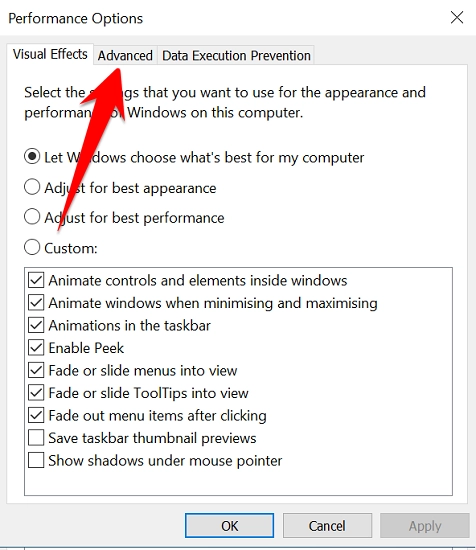
Then, click on Change under the Virtual Memory section:
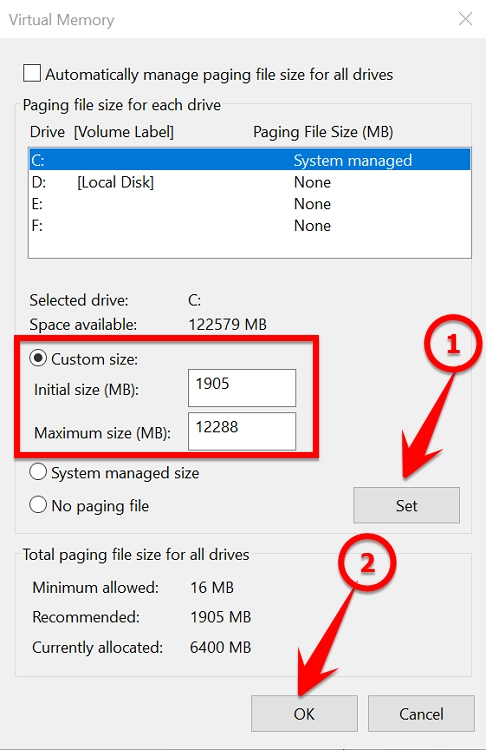
First, uncheck the Automatically manage paging file size for all drives option and click on the Custom size radio button:

Now, you have to enter the Initial and Maximum size (in MB). It is fine to enter the initial size the same as the recommended size. For instance, 1905 MB is recommended size in my case (this size will be different in your case) so, I’ll set the initial size to 1905 MB.
As far as the maximum size of a page file is concerned, Microsoft recommends at least one and a half times (1.5 times) the size of your physical memory (RAM). For example, if you have 4 GB of RAM, the maximum size of virtual memory should be at least 6 GB (4 x 1.5) which is 6,144 (6 x 1024) in MBs.
For 16 GB RAM, you should set the maximum virtual memory size to 24 GB which is 24,576 in MBs. Similarly, for 32 GB RAM and Windows 11 users, you should set the maximum virtual memory limit to 48 GB which becomes 49,152 MBs.
Note: The maximum size should not exceed 3 times the size of your installed RAM.
Once you set limits, click on Set and then, hit the Ok button:
To disable virtual memory, you need to select the no paging file radio button in the Virtual Memory settings, however, it’s not recommended as it can cause various system performance issues.
Step 4: Restart Your System
Now, you’ll need to restart or reboot your system for the changes to take effect.
After restarting your PC, you’ll notice improvements in performance especially when working with large files and multitasking.
In case you notice lags or crashes after this process, you can follow the above steps to revert the changes.
So, this is an entire procedure to reset or change virtual memory in Windows 10 in a few steps. From now on, multitasking won’t be a problem for you. And, you can easily fix Windows paging file issues too.
Whenever you have low virtual memory, you can increase its size by following this same procedure.
Method 2: Reset Virtual Memory Using Command Prompt
You can also use CMD to reset paging size and you just need to type a few commands to perform this task.
Follow the given steps to reset Virtual Memory in Windows 11 or Windows 10 using the command prompt:
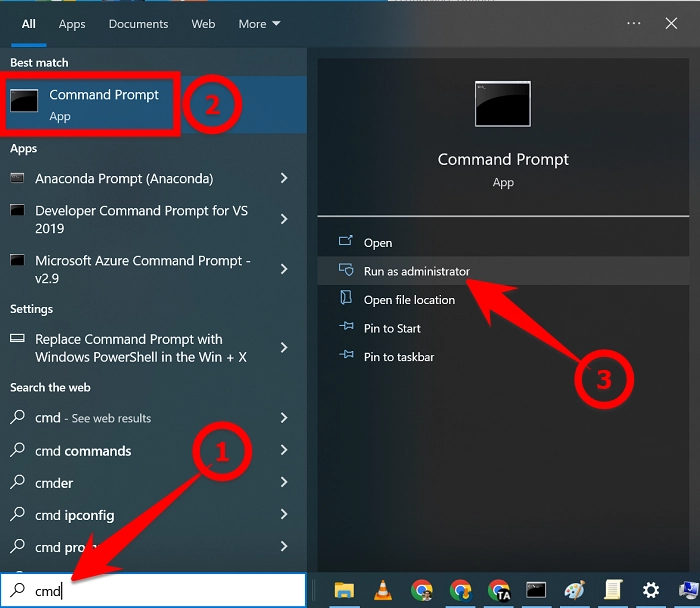
- First, click on the Windows Start button
- Type “CMD” in the Windows search bar and run the command prompt as an administrator from the list of results:
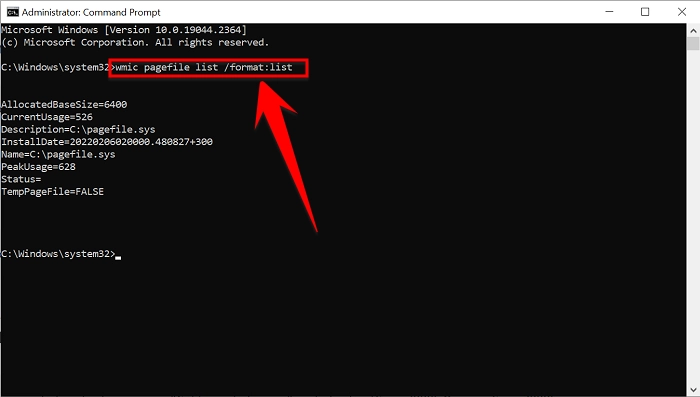
- Type the following command and press Enter. Upon executing the following command, you can check the current virtual memory in Windows 10 or 11:
wmic pagefile list /format:list
- After that, type the following command and press Enter. This command will switch from automatically manage paging file size to custom management.
wmic computersystem where name="%computername%" set AutomaticManagedPagefile=false

- Then, copy and paste the following command and press Enter. Replace “XXXX” with the desired size in megabytes for both the initial and maximum sizes.
wmic pagefileset where name="C:\\pagefile.sys" set InitialSize=XXXX,MaximumSize=XXXX
For instance:
wmic pagefileset where name="C:\\pagefile.sys" set InitialSize=1905,MaximumSize=12288
The above example sets the initial page file size to 1905 MB and the maximum size to 12288 MB.
- Once you execute this command, you’ll need to restart your computer for the changes to take effect. The paging file size limits will be changed once the system is rebooted.
Note: Setting the initial and maximum size properly will also help reduce the chances of system crashes and lags.
After following this process, you should observe improvements because your system will continue to operate smoothly and will prevent crashing due to a lack of physical memory (Random Access Memory).
This is how you can reset your Windows 10 or Windows 11 virtual memory easily.
How to Clear Virtual Memory in Windows 10/11?
Resetting a virtual memory means either clearing the virtual memory or manually changing it again.
To clear the virtual memory in Windows 10 and Windows 11, follow the given procedure:
Press Windows + R keys together to open the run dialog box.
Type gpedit. msc in the open field and click on OK to open the Group Policy Editor:

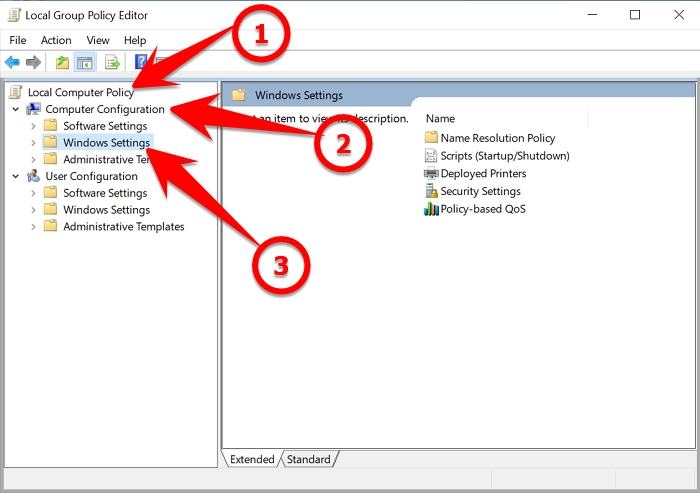
Navigate to Local Computer Policy > Computer Configuration > Windows Settings :
Go to Security Settings > Local Policies > Security Options :
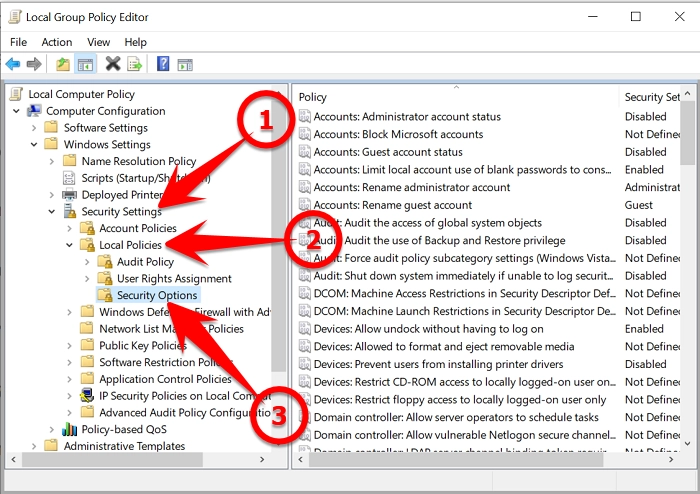
In security options, find and double-click on Shutdown: Clear virtual memory pagefile :

Click on the Enabled option and then, hit Apply button:
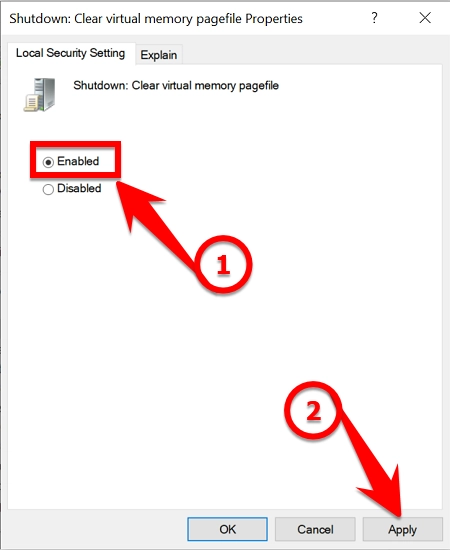
Now, every time you Shutdown your system, the virtual memory will be cleared automatically.
So, in this way, you can free up virtual memory or virtual RAM easily. There is also a registry editor method that can be used for this task, but this is an easier method.
Why Does Windows Use Virtual Memory Concept?
Virtual Memory is one of the important features of the operating system that allows it to use more system memory than it physically has. But how? This goal is achieved by using a portion of your hard drive as a temporary storage space when the physical RAM is full in order to improve the overall system performance.
When a system runs out of physical memory or RAM, it temporarily transfers data from the RAM to a space on the hard drive called the paging file or virtual memory. It’s actually the disk space on your hard drive. Solid-state drives (SSDs) perform better since they are fast. This allows the computer system to continue running smoothly and effectively.
Note: You can check your random access memory (RAM) usage and disk usage in the task manager performance tab.
Virtual memory is particularly useful when dealing with large programs that require more memory than the computer can physically provide. Due to the virtual memory feature, you are running heavy games on a limited amount of RAM.
In short, virtual memory compensates for a shortage of physical memory (RAM). The operating system itself handles it efficiently, however, we can also set the virtual memory limits manually (as we did earlier).
It is generally recommended to leave the virtual memory paging file settings as they are and let the operating system handle them more efficiently.
However, you can manually increase the limit if you face crashes or lags in performance by following the steps described above.
Frequently Asked Questions
Is it Safe to Disable Virtual Memory?
Disabling virtual memory can negatively affect your computer’s performance and stability. Virtual memory allows one to execute multiple programs simultaneously and handle larger workloads efficiently. Although you can disable virtual memory, it’s not recommended.
How Much Virtual Memory Should I Set?
Microsoft recommends setting the virtual memory to at least 1.5 times the amount of physical memory (RAM). For example, if your system has 8 GB of RAM, you should set the virtual memory to at least 12 GB. However, it can even be increased to twice or three times as well to ensure stability.
What Happens If I Reset Virtual Memory?
Resetting a virtual memory means changing the size of your virtual memory back to the default settings, which ensures that your computer is running smoothly and efficiently. Also, it clears the existing Paging File occupied by the previous virtual memory allocation.
What Are the Benefits of Resetting Windows Virtual Memory?
If you reset the Virtual Memory in Windows 11/10 properly, it can benefit you in several ways, for instance, Enhanced System Performance, Resolving Memory Issues, troubleshooting lags & freezing problems, etc.
What Are the Risks Involved In Resetting Virtual Memory?
Improper virtual memory management can cause several issues like system crashes, slow performance, application errors, and excessive disk activity. It’s advised not to play with the default Virtual Memory settings to avoid instability.
What Are The Causes Of Low Virtual Memory In Windows 10/11?
Low Virtual Memory can be caused due to several reasons, including running heavy programs simultaneously, insufficient RAM or disk space, improper configuration of page file settings, or virus/malware infection. You might be running low on virtual memory because of any of these reasons.
What Are The Best Settings For Virtual Memory In Windows 10/11?
To follow the best settings for Virtual Memory in Windows 11/10, you should set virtual memory no less than 1.5 times the amount of your physical RAM. Furthermore, don’t exceed the maximum limit of 3 times the RAM size to prevent unnecessary disk usage. These are the correct virtual memory settings.
Bottom Line:
After resetting your Windows 10 or Windows 11 virtual memory, your system performance will be better than before. You can try different virtual memory sizes and observe which one suits you best according to your system.
Some users recommend to turn off the paging file but it’s not a good idea since you can face different issues like memory shortage, software crashes, and lags. Also, some heavy applications will not work. Although you have a large amount of RAM but disabling virtual memory is not a great idea.
So, I hope you learned something from this guide. If so, you can share your thoughts in the comment section. Furthermore, you can share this useful guide with others too so that they can also get benefit from it.